Blog
How to Insert a Section Break in Word

ection breaks in Microsoft Word allow you to divide your document into separate sections, giving you more control over formatting, layout, and page organization. Whether you need to change margins, apply different headers and footers, or switch between page orientations, section breaks make it easy to customize each part of your document independently.
This guide will walk you through the different types of section breaks available in Word, including Next Page, Continuous, Even Page, and Odd Page breaks. You’ll also learn how to insert, modify, and remove section breaks to structure your document efficiently.
How to Insert a Section Break
Place your cursor where you want the new section to begin. To avoid awkward breaks, it’s best to insert a section break at the end of a paragraph or sentence. Then, go to the Layout tab in the ribbon at the top of the window. Under Page Setup, click Breaks to open a drop-down menu with various section and page break options. Under Section Breaks, choose the desired type:
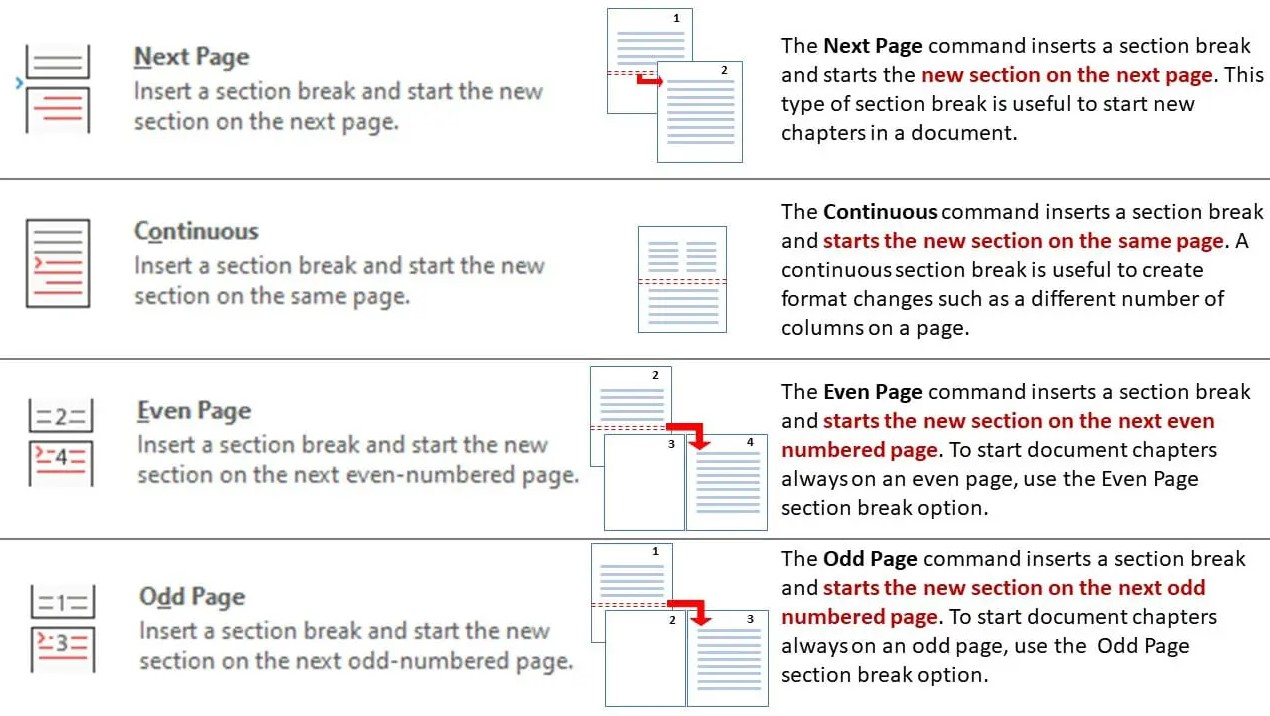
- Next Page: Moves the content to the next page, starting a new section.
- Continuous: Starts a new section on the same page, often used for multi-column layouts.
- Even Page: Starts the new section on the next even-numbered page.
- Odd Page: Starts the new section on the next odd-numbered page.
How to Delete a Section Break
To remove a section break, go to the Home tab, click the space just to the left of the break you want to delete, and press the Delete key on your keyboard.
How to Change the Type of Section Break
To change the type of a section break, click to the left of the section break you want to modify. Then, switch to the Layout tab, click Breaks, and select a new section break type from the menu. Your document will update automatically with the new section format.
Office keysat the lowest price. Buy now and activate in minutes!