Blog
How to Check Inclusive Language in Microsoft Word

Microsoft Word includes an advanced grammar and style checker that helps ensure your writing is inclusive. By enabling inclusive language suggestions, Word can identify biased terms and suggest more neutral alternatives. This guide will walk you through the process of enabling and using inclusive language checks in Microsoft Word.
Step 1: Open Microsoft Word
- Launch Microsoft Word on your computer.
- Open an existing document or create a new one.
Step 2: Access Proofing Settings
- Click File in the top-left corner.
- Select Options at the bottom of the menu.
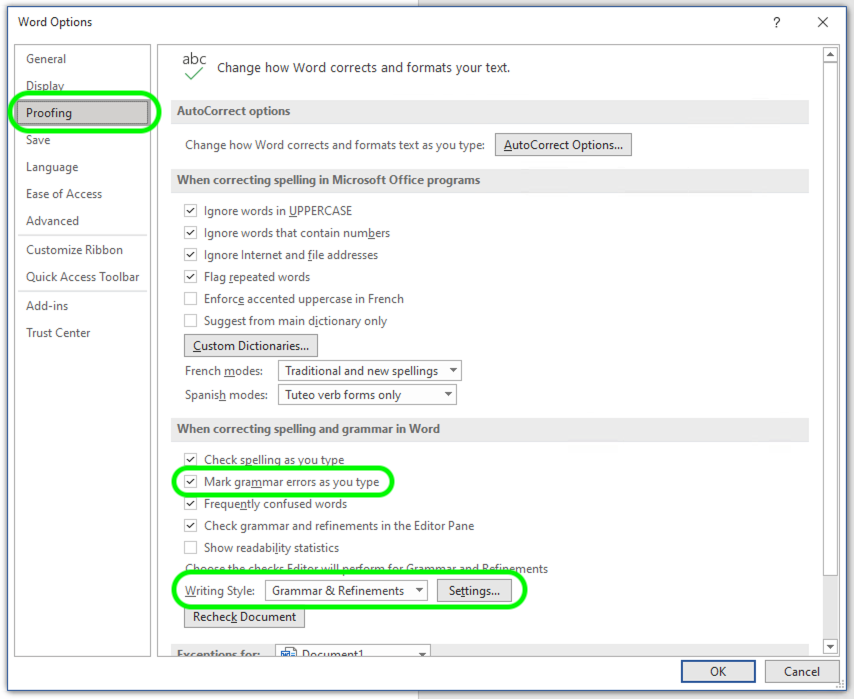
- In the Word Options window, click Proofing from the left-hand panel.
Step 3: Open Grammar and Refinements Settings
- Scroll down to the When correcting spelling and grammar in Word section.
- Click Settings next to Writing Style (Grammar & Refinements) or Grammar Settings (depending on your version of Word).
Step 4: Enable Inclusive Language Checks
- In the Grammar Settings window, locate the Inclusiveness section.
- Check the boxes for the types of inclusive language you want Word to review, such as:
- Age Bias
- Cultural Bias
- Disability Bias
- Ethnic Slurs
- Gender Bias
- Gender-Neutral Pronouns
- Sexual Orientation Bias
- Click OK to save your changes.
Step 5: Use Inclusive Language Suggestions
Select a suggestion or choose Ignore if no changes are needed.
As you type, Microsoft Word will underline non-inclusive terms with a blue double underline or another visual cue.
Right-click the underlined word or phrase to see suggested alternatives.
Buy an authentic Office key. Instant digital delivery and no delays!