Blog
How to Easily Create a Hanging Indent in Microsoft Word

Learn how to easily create a hanging indent in Word.
Applying a Hanging Indent to Selected Tex
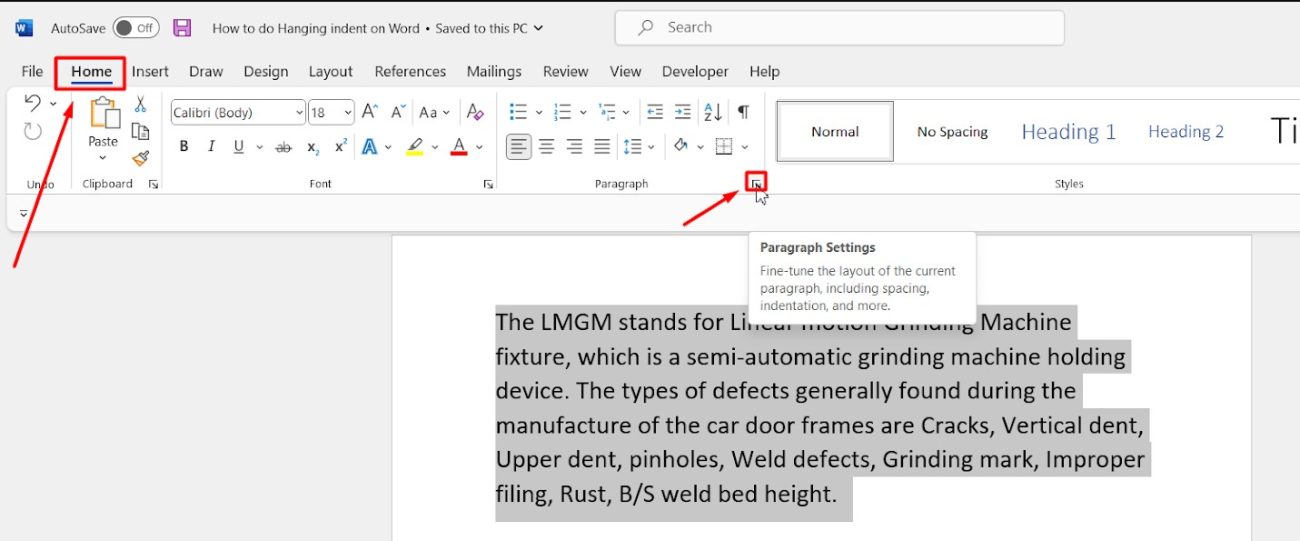
- To begin, place your cursor in the paragraph you wish to modify, or select multiple paragraphs.
- Next, click the Home tab on the ribbon. Then, click the Paragraph Settings icon in the bottom-right corner of the Paragraph section to open the ‘Paragraph’ settings window.
- Under the Indentation section, click the Special drop-down menu and select Hanging. After that, adjust the indentation size by modifying the value in the By box (measured in centimeters).
- At the bottom of the window, a preview of the indent will appear. Finally, click OK to apply the hanging indent to the selected text.
Applying a Hanging Indent to the Entire Document
If you want to apply the change only to the current file, choose ‘This Document Only.’ However, to ensure the setting applies to all future documents, select ‘All Documents Based on the Normal.dotm Template.’ This way, your formatting preferences will remain consistent across new files
Buy a genuine Office key instantly, affordable and easy to activate!