Blog
How to Insert GIFs into Word: Simple Step-by-Step Guide

Adding GIFs to your Microsoft Word document can enhance your content, making it more engaging and visually appealing. Whether you’re preparing a fun presentation, an informal document, or just want to add some animation to your report, inserting GIFs is simple and effective. This step-by-step guide will walk you through the process of inserting GIFs into Microsoft Word on different platforms.
Step 1: Choose Your GIF
Before inserting a GIF into Word, make sure to choose one that suits your document. There are several websites where you can find GIFs:
- Giphy (giphy.com): A popular source for a wide range of animated GIFs.
- Tenor (tenor.com): Another well-known platform for searching and downloading GIFs.
Make sure the GIF you choose is appropriate for your audience and the context of your document.
Step 2: Insert a GIF in Word on Windows (PC)
- Open your Microsoft Word document.
- Place your cursor where you want the GIF to appear.
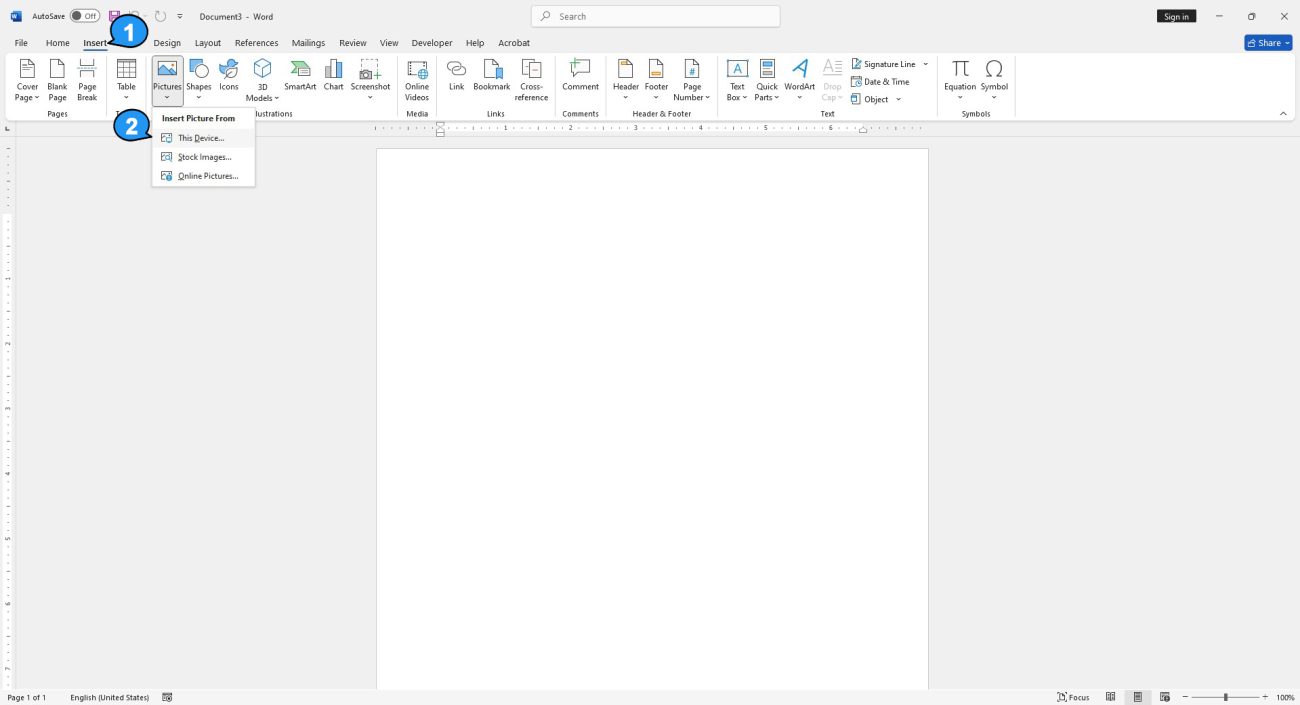
- Click on the Insert tab at the top of the screen.
- In the Insert tab, click on Pictures and select This Device.
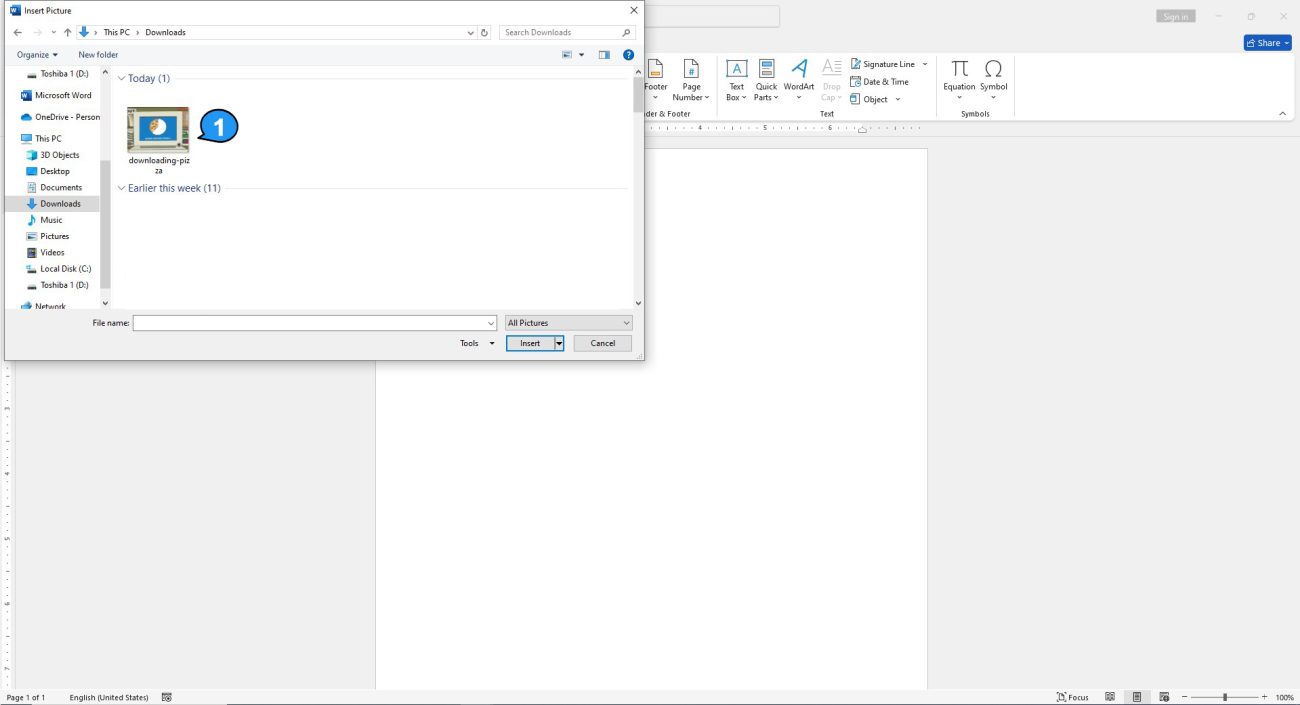
- Locate the GIF file you want to insert and click Insert.
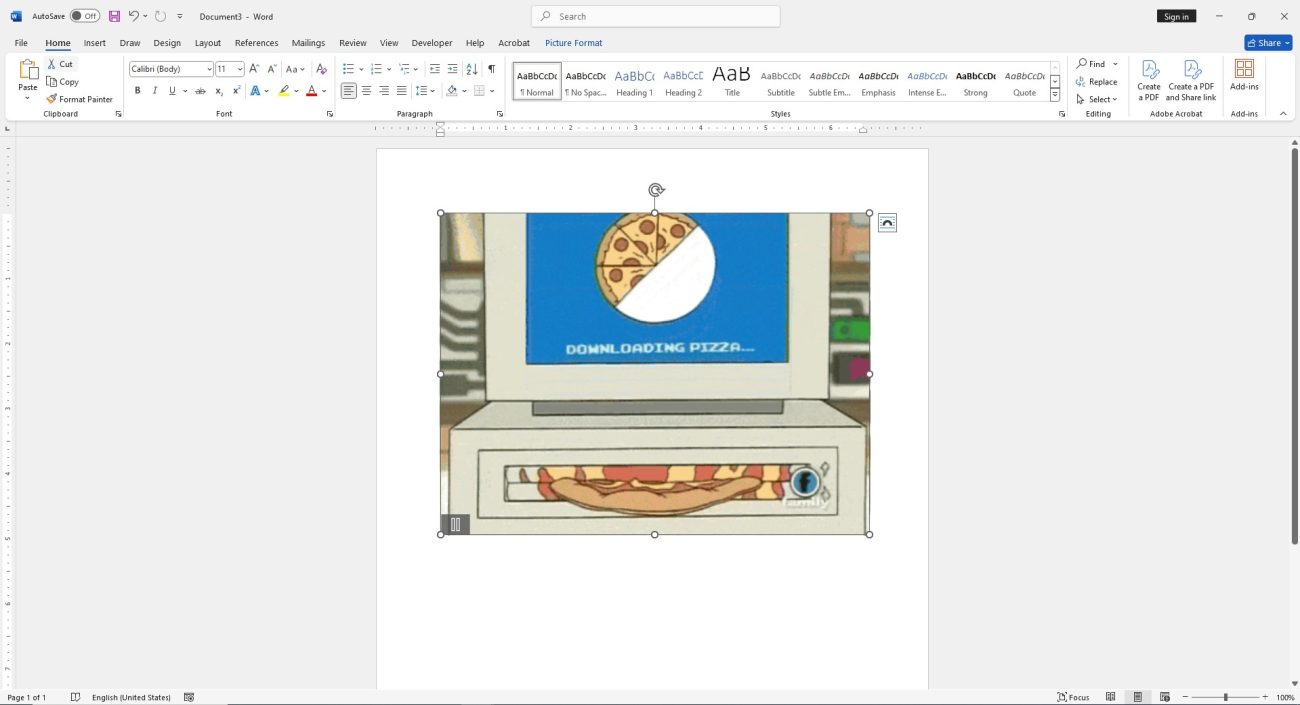
The GIF will now appear in your document. You can resize it or adjust its position as needed.
Step 3: Insert a GIF in Word on Mac
- Open your Microsoft Word document on your Mac.
- Place your cursor where you want the GIF to appear.
- Click on the Insert tab at the top of the screen.
- Select Pictures > Picture from File.
- Navigate to the location of your saved GIF, select it, and click Insert.
The GIF will be added to your document. You can resize and reposition it as needed.
Step 4: Insert a GIF in Word Online (Web Version)
- Open your document in Word Online.
- Place your cursor where you want to insert the GIF.
- Go to the Insert tab in the toolbar.
- Click on Pictures, then select This Device to upload the GIF file.
- Select the GIF you want to insert and click Insert.
The GIF will be inserted into your document. You can adjust its size or position by dragging the corners.
Step 5: Insert a GIF on Mobile Devices (iOS/Android)
- Open the Microsoft Word app on your mobile device.
- Tap where you want the GIF to appear.
- Tap on the Insert option from the toolbar, then select Pictures.
- Choose the location where your GIF is saved (from your phone’s gallery or device storage).
- Select the GIF you want to insert.
The GIF will appear in your Word document. You can resize and move it as needed.
File Explorer will open. Locate and select the GIF you want to insert. Click “Insert.”
The GIF will now appear in your Word document with a pause icon in the bottom-left corner. Click it to pause the animation.
You’ll also see automatically generated alt text below the GIF. Since it may not always be accurate, consider adding a descriptive alt text to improve accessibility. To edit it, simply click the text at the bottom of the GIF.
Alternatively, right-click the GIF and then select “Edit Alt Text” from the context menu.
The Alt Text pane will appear to the right of the window. Type the desired alt text in the text box.
Now, you’ve successfully inserted a GIF into your Word document and made it accessible to all.
Buy Office keys at unbeatable prices and nstant delivery guaranteed!