Complete Visual Studio Installation and Activation Guide
Step 1: Download and Install
Visit the official Visual Studio website at visualstudio.microsoft.com.
- Choose the Visual Studio version you wish to install (Professional or Enterprise).
- Click on "Download" to start the Visual Studio installer download.
- Once downloaded, open the setup file to begin the installation.
- During installation, the installer will ask you to select your preferred workloads. Choose the ones you need and click "Install."
- The installation will take some time, depending on your selected workloads and internet speed. Wait for the process to complete.
Step 2: Activation
After installation is complete, open Visual Studio.
- If this is your first time running Visual Studio, you will be prompted to sign in with your Microsoft account.
- Sign in to activate Visual Studio. To enter a product key, click on Help > Register Product, then input your license key.
Step 3: Update and Start Development
After completing activation, follow these steps to update and begin your development work:
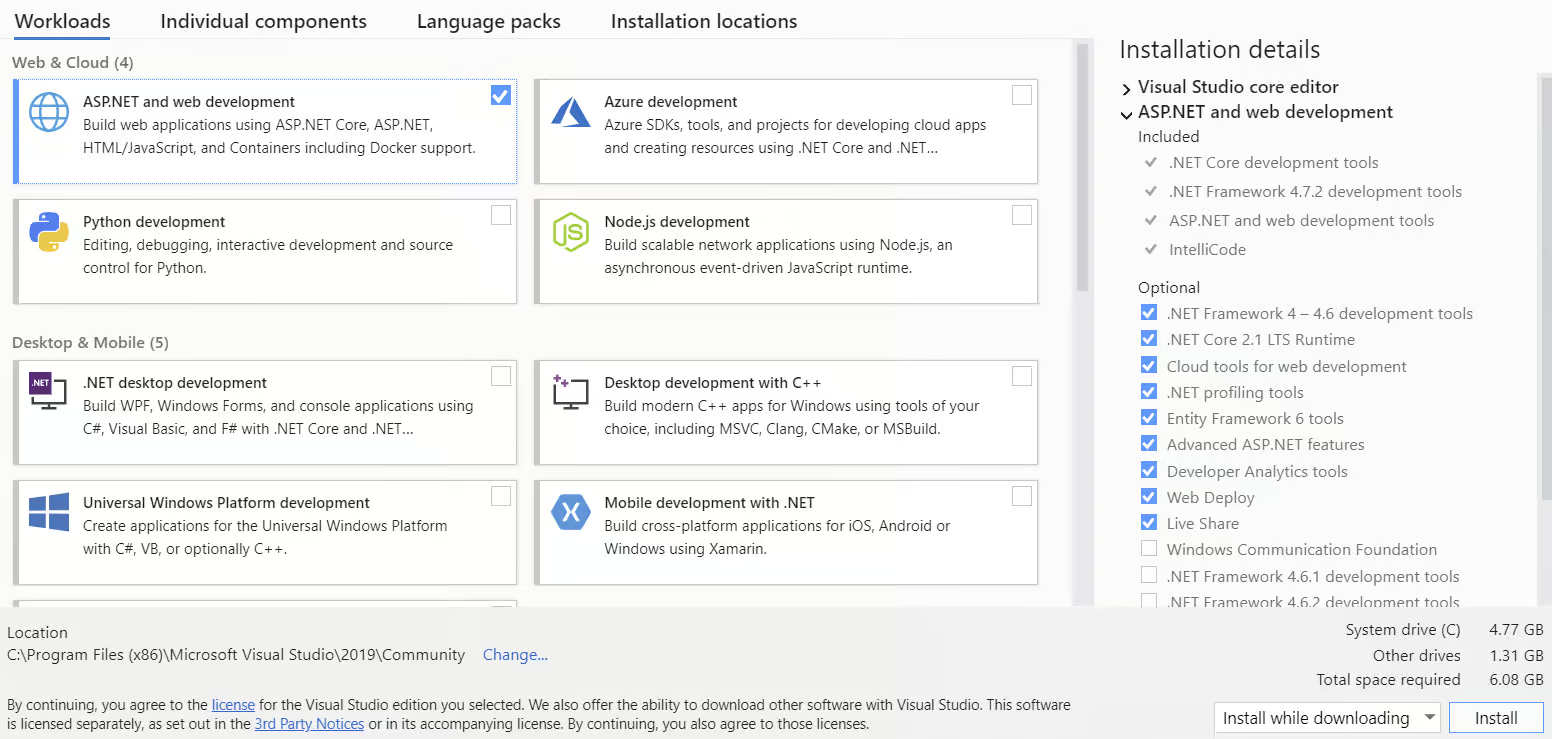
- To ensure your Visual Studio is up to date, go to Tools > Get Tools and Features.
- In the Visual Studio Installer, click on "Update" to download and install any available updates.
- Once the updates are installed and Visual Studio is fully activated, you can begin your development projects.
- Open the New Project window, select your desired template, and start coding!
⚠️ Having Problems? Connect on our Live Chat
Still Don't Have a Visual Studio Key?