Guides

Step-by-Step Guide to Installing and Activating Windows Server

Step 1: Install Windows Server

  1. Download the Windows Server ISO from the official Microsoft website.
  2. Create a bootable USB or mount the ISO in a virtual machine.
  3. Boot from the installation media and select Install Now.
  4. Choose the Windows Server edition to install.
  5. Follow the prompts, configure partitions, and complete the installation.
  6. Set up an administrator account and log in.
WINDOWS SERVER INSTALLING
Activate Windows Server

Step 2: Activate Windows Server

Once the installation is complete, go to the activation settings to activate Windows Server.

  1. Open Settings > Update & Security > Activation.
  2. Click Change product key, enter your 25-character Windows Server key, and click Next.
  3. Windows Server will activate automatically if connected to the internet.

Step 3: Activate via Command Prompt (If Needed)

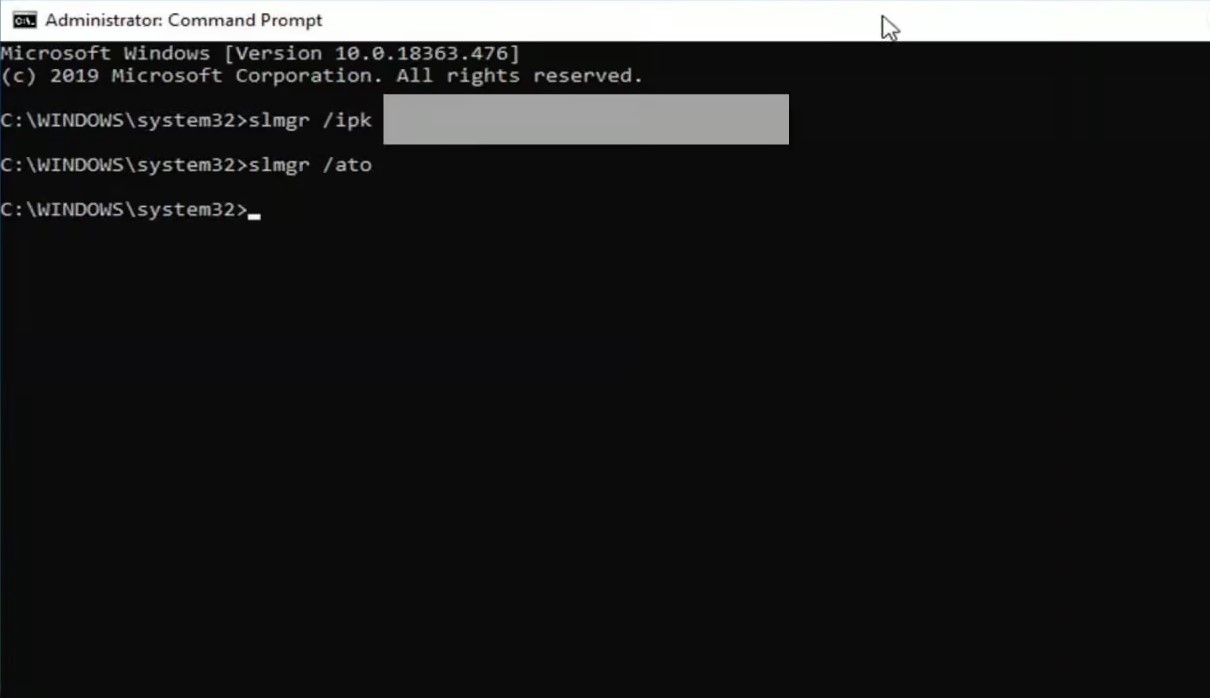
If activation fails, follow these steps:

  1. Open Command Prompt as Administrator.
  2. Enter the following command to install your product key: slmgr /ipk {YOUR-PRODUCT-KEY}
  3. Press Enter, then type the command to activate: slmgr /ato
  4. Press Enter again. You should see a confirmation message once activation is successful.

By completing these steps, your Windows Server should be successfully activated.

Still don’t have a Windows Server key?

Get your Windows Server today!

Unlock your genuine Windows Server key at an unbeatable price! Enjoy fast, authentic activation keys with instant delivery. 🚀

Leave a Reply

Your email address will not be published. Required fields are marked *